
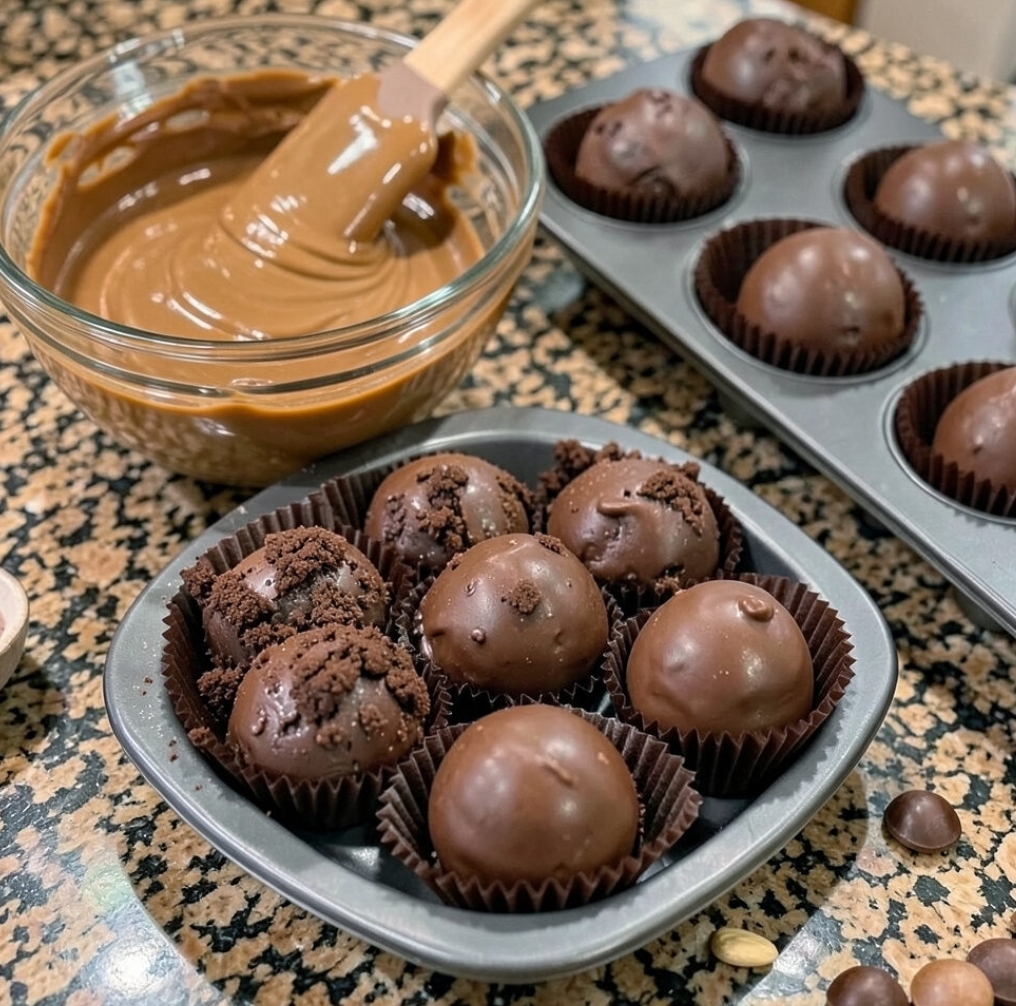
Easy No-Bake Butterfinger Balls: Your New Favorite Holiday Treat!
If you’re looking for a crowd-pleasing dessert that’s simple to make but delivers big on flavor, these Butterfinger Balls are exactly what you need. Often referred to as chocolate dome treats, these no-bake delights are a staple at holiday gatherings, especially Christmas, and disappear quickly! With a rich, smooth coating over a crunchy, sweet center, they offer an irresistible combination of textures and tastes.
This recipe for Butterfinger Balls is incredibly straightforward, requiring minimal effort and no oven time. It’s a fantastic project for beginner bakers or anyone who wants a delicious dessert without the fuss. The smooth caramel-colored ganache-like topping perfectly coats a crispy, sweet core, creating a treat that’s both elegant and fun to eat. Get ready to impress your friends and family with these delightful chocolate dome treats!
Why You’ll Love This Easy Butterfinger Balls Recipe
No-Bake Simplicity: Forget turning on the oven! This recipe is entirely no-bake, making it perfect for hot days or when your oven is occupied.
Crowd-Pleaser: These Butterfinger Balls are always a hit. Their unique texture and flavor make them incredibly addictive.
Perfect for Gifting: Pack them in decorative boxes for a homemade gift that everyone will appreciate during the holidays.
Customizable: While delicious as is, they can be easily adapted with different candy centers or toppings.
Kid-Friendly: A fun recipe to make with children, as there’s no hot oven involved.
Ingredient Notes for Perfect Chocolate Dome Treats
The beauty of these Butterfinger Balls lies in their simplicity, which means the quality of your ingredients really shines through. Here’s a little more detail on what you’ll need:
Butterfinger Candy Bars: The star of the show! You’ll want to crush these finely to create the signature crispy, peanut-buttery core. A food processor works best for an even crumble, but a Ziploc bag and a rolling pin do the trick too.
Creamy Peanut Butter: Choose a good quality, creamy peanut butter. Avoid natural peanut butter that separates too much, as it can affect the consistency of your centers. The peanut butter binds the crushed Butterfingers and adds to the rich flavor.
Powdered Sugar (Confectioners’ Sugar): This provides sweetness and helps to firm up the centers without making them grainy. Sift it if it’s lumpy to ensure a smooth mixture.
Melted Butter: Unsalted butter is preferred so you can control the saltiness. It helps bring the center ingredients together into a workable dough.
Chocolate Chips (for coating): A good quality semi-sweet or milk chocolate will give you the best flavor and a smooth, glossy coating. You can also use chocolate melting wafers for an even easier melting process and a super smooth finish.
Caramel or Peanut Butter Chips (for coating): The image suggests a beautiful caramel-colored ganache or sauce. Combining milk chocolate with caramel or peanut butter chips will achieve this lovely hue and add another layer of flavor.
Heavy Cream (for ganache-like coating): Essential for creating that smooth, pourable, glossy coating. The fat content in heavy cream helps emulsify the chocolate and creates a luxurious texture.
Helpful Cooking and Baking Tips for Butterfinger Balls
Crushing the Candy: For the best texture in your Butterfinger Balls, crush the candy bars into varying sizes—some fine crumbs and some slightly larger pieces for that signature crunch.
Chilling is Key: Don’t skip the chilling steps! Chilling the centers before coating ensures they hold their shape and makes them easier to handle. Chilling after coating helps the chocolate set quickly and prevents smudging.
Melting Chocolate: When melting chocolate for the coating, do so gently. A double boiler or microwave on low power, stirring frequently, will prevent burning. If using the microwave, heat in 30-second intervals, stirring well after each.
Achieving a Smooth Coating: For a super smooth and glossy finish, ensure your melted chocolate mixture is well-stirred and free of lumps. If it’s too thick, add a tiny bit more heavy cream (a teaspoon at a time) until it reaches the desired consistency.
Using Paper Cups: Dark brown paper baking cups (mini cupcake liners) are perfect for holding these chocolate dome treats. They make them easy to serve and prevent them from sticking together.
Working in Batches: If making a large batch, it might be easier to coat a few centers at a time, allowing them to set slightly before moving on to the next batch.
Ingredient Substitutions for Your Chocolate Dome Treats
Candy Bar Centers: While Butterfinger is classic, feel free to experiment with other crunchy candy bars like Heath bars or Skor bars for a toffee-flavored twist.
Peanut Butter: Almond butter or cashew butter can be used as an alternative if you prefer, but be aware it will alter the flavor profile. For a nut-free option, sunflower seed butter could work.
Chocolate Coating: You can use all milk chocolate, dark chocolate, or white chocolate for the coating. Experiment with different flavor combinations!
Cream: Half-and-half can be used in a pinch for the coating, but heavy cream will yield the richest, smoothest ganache-like consistency.
Variations to Try
Sprinkles: Before the coating sets, sprinkle with festive sprinkles for a holiday touch.
Drizzle: Drizzle with contrasting melted chocolate (e.g., white chocolate over the caramel coating) for an elegant finish.
Miniature Size: Make smaller balls for bite-sized treats. Adjust chilling times accordingly.
Spices: A pinch of cinnamon or a tiny dash of cayenne pepper can add an unexpected warmth to the chocolate coating.
Serving Suggestions
These Butterfinger Balls are delightful on their own, but they also make a wonderful addition to a dessert platter. Serve them alongside other holiday cookies, brownies, or mini cheesecakes. They are also perfect with a cup of coffee or hot cocoa.
Storage and Reheating
Store your Butterfinger Balls in an airtight container at room temperature for up to 5-7 days, or in the refrigerator for up to 2 weeks. If refrigerated, allow them to come to room temperature for about 15-20 minutes before serving for the best texture and flavor. These treats also freeze beautifully for up to 3 months. Thaw them in the refrigerator overnight before serving.
Frequently Asked Questions
Q: Can I make these ahead of time?
A: Absolutely! These are perfect for making ahead. They store well, and the flavors often deepen over time.
Q: Why is my coating too thick or too thin?
A: If your coating is too thick, add heavy cream a teaspoon at a time until it reaches the desired consistency. If it’s too thin, you might need to add a few more chocolate chips and melt them gently, or allow it to cool slightly to thicken.
Q: Do I need special equipment?
A: A food processor helps with crushing the candy, but it’s not essential. A sturdy bowl, spatula, and a muffin tin with paper liners are generally all you need.
Q: Can I use different candy bars for the center?
A: Yes, you can experiment with other crunchy candy bars, but the classic Butterfinger provides that unique flaky, peanut-buttery crunch that makes these balls so special.
Final Recipe Notes
These Butterfinger Balls are more than just a simple dessert; they’re a tradition for many, bringing joy and deliciousness to any occasion. Their ease of preparation combined with their irresistible flavor makes them a truly special treat. Whether you’re making them for a holiday party, a casual get-together, or just to satisfy a sweet craving, they’re guaranteed to be a hit. Enjoy the process of creating these delightful chocolate dome treats, and get ready for rave reviews!
Ingredients
12 regular-sized Butterfinger candy bars (about 20 oz total), crushed
1 cup creamy peanut butter
1 cup powdered sugar, sifted
1/2 cup (1 stick) unsalted butter, melted
12 oz milk chocolate chips (or melting wafers)
6 oz caramel chips or peanut butter chips (optional, for flavor/color)
1/2 cup heavy cream
Dark brown paper baking cups (mini muffin liners)
Instructions
Prepare the Butterfinger Centers: In a large glass mixing bowl, combine the crushed Butterfinger candy bars, creamy peanut butter, sifted powdered sugar, and melted butter. Mix well with a sturdy spatula until thoroughly combined and a thick, pliable dough forms.
Form the Balls: Roll the mixture into approximately 24-30 small balls, about 1-inch in diameter. Place them on a baking sheet lined with parchment paper. Chill in the refrigerator for at least 30 minutes to firm up.
Prepare the Coating: While the centers are chilling, prepare the chocolate coating. In a microwave-safe bowl, combine the milk chocolate chips (and caramel/peanut butter chips, if using) and heavy cream. Microwave on medium power in 30-second intervals, stirring well after each, until the chocolate is completely melted and smooth. Stir until it forms a glossy, caramel-colored ganache-like sauce.
Coat the Balls: Place dark brown paper baking cups into a metal muffin tin for stability. Take the chilled Butterfinger balls and, one by one, place them into the paper cups. Spoon the warm chocolate coating generously over each ball, ensuring it’s fully covered and forms a smooth dome. Allow any excess to drip down into the cup.
Chill to Set: Once all balls are coated, return the muffin tin with the chocolate dome treats to the refrigerator. Chill for at least 1-2 hours, or until the chocolate coating is completely set and firm to the touch.
Serve and Enjoy: Once set, these delicious Butterfinger Balls are ready to serve. Enjoy these easy, no-bake chocolate dome treats!
Prep time: 30 minutes
Cook time: 0 minutes
Total time: 2 hours 30 minutes (including chilling)
Servings: 24-30 chocolate dome treats