A humble, nostalgic dessert born from hard times, this surprisingly delicious pie proves that magic can happen with just a few pantry staples. With a buttery crust and a soft, custard-like filling made mostly from water, sugar, flour, and vanilla, it’s sweet, tender, and deeply comforting—like a cross between chess pie, lemon curd, and warm pudding.
Why You’ll Love This Recipe
This isn’t just pie—it’s history on a plate. Created during the Great Depression when ingredients were scarce, Water Pie was a way for families to make something sweet without milk, eggs, or fruit. Yet despite its simplicity, it bakes into a golden, silky dessert with a delicate sweetness and subtle richness from butter and vanilla.
Perfect for:
Historical cooking projects
Frugal or minimalist baking
Make-ahead desserts
Curious bakers who love vintage recipes
💧 “I made this because I didn’t have eggs,” said one home cook. “My kids asked if we could have it again tomorrow!”
Ingredients
For the Crust & Filling
1 unbaked 9-inch pie crust (store-bought or homemade)
For the Simple Filling
1½ cups (360ml) cold water
1 cup (200g) granulated sugar
3 tbsp (24g) all-purpose flour
¼ tsp salt
4 tbsp (½ stick / 56g) unsalted butter, cold, cut into small cubes
1 tsp pure vanilla extract
Optional Upgrades
Pinch of ground cinnamon or nutmeg (for warmth)
Grated lemon zest (adds brightness)
Whipped cream or ice cream, for serving
Step-by-Step Instructions
1. Preheat & Prep
Preheat oven to 400°F (204°C).
Place unbaked pie crust in a 9-inch pie dish. Flute edges decoratively if desired. Set aside.
✅ Pro Tip: Place a rimmed baking sheet under the pie pan—this catches any potential spills and makes handling easier.
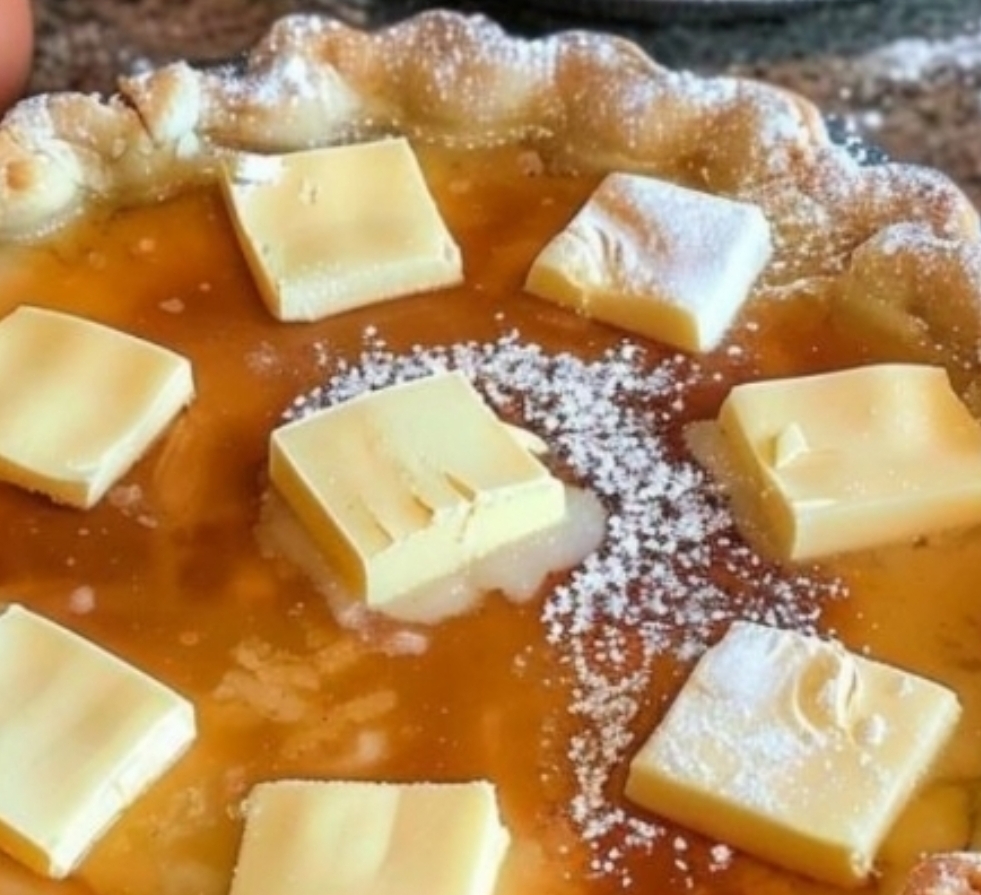
2. Pour Water Into Crust
Carefully pour 1½ cups cold water directly into the unbaked pie shell.
❗ Yes—right into the crust! It may seem like too much, but trust the process.
3. Add Dry Ingredients
In a small bowl:
Whisk together sugar, flour, and salt until no lumps remain.
Gently sprinkle this mixture evenly over the surface of the water—don’t stir.
4. Top with Butter & Vanilla
Scatter cubed cold butter evenly over the top.
Drizzle vanilla extract across the surface.
✅ No need to mix —everything will blend as it bakes.
5. Bake in Two Stages
Place pie in the center of the oven.
Bake at 400°F for 30 minutes.
Without removing the pie, reduce heat to 375°F (190°C).
Continue baking 30–35 minutes more, until:
The filling is set and slightly puffed (it should jiggle only slightly in the center)
The crust is deep golden brown
✅ Watch closely near the end —don’t let the edges burn.
6. Cool Completely
Remove from oven and place on a wire rack.
Let cool at least 2 hours, preferably 3–4 hours, until completely set.
❗ Do not slice while warm—the filling needs time to firm up.
7. Serve & Enjoy
Slice with a sharp knife.
Serve plain or with a dollop of whipped cream or a scoop of vanilla ice cream.
Enjoy the soft, sweet, custardy texture and the quiet joy of simple things done well.
You Must Know
Don’t skip cooling time —under-set pie = soupy slices. Patience pays off.
Use real butter and vanilla —they carry the flavor.
Flour thickens the filling —no cornstarch or substitutes needed.
It won’t taste like “just water” —the long bake transforms it into something rich and velvety.
Tastes even better the next day!
Storage Tips
Store covered in the fridge for up to 4 days.
Not recommended for freezing —texture changes upon thawing.
Cover loosely after cooling to prevent condensation.
Ingredient Substitutions
All-purpose flour
Gluten-free 1:1 blend
Works well if GF-friendly
Granulated sugar
Coconut sugar (color will be darker)
For natural alternative
Butter
Margarine or vegan butter
For dairy-free version
Vanilla extract
Almond extract (½ tsp)
Adds nutty depth
Water
Strong brewed tea or coffee
For subtle flavor twist
Serving Suggestions
Serve at room temperature or chilled.
Pair with coffee, tea, or spiced cider.
Great for history-themed dinners or school projects.
Double the batch and gift one to a neighbor.
Cultural Context
Born during the Great Depression (1930s), Water Pie reflects a time when families stretched every ingredient to feed their loved ones. Found in rural kitchens and handwritten recipe cards alike, it honors ingenuity, resilience, and the belief that dessert—even a simple one—can bring comfort and dignity. Today, it’s a reminder that good food doesn’t require extravagance—just heart.
Pro Tips
Double the recipe? Yes—perfect for sharing.
Want more flavor? Add a pinch of cinnamon, nutmeg, or lemon zest to the dry mix.
Make ahead: Bake one day, serve the next—ideal for stress-free entertaining.
Label your dish: People will ask for the recipe.
Say “ready?” before slicing —it’s part of the ritual.
Frequently Asked Questions
Q: Why doesn’t it taste watery?
A: The flour and long baking time thicken the water into a smooth, custard-like filling.
Q: Can I use milk instead of water?
A: Yes—but then it’s not authentic Water Pie! Milk makes it richer, closer to chess pie.
Q: Is this gluten-free?
A: Only if using GF flour and crust. Always verify labels.
Q: Can I add fruit?
A: Absolutely! Try a layer of apples or berries underneath before adding water.
Q: Can I make mini versions?
A: Yes! Use muffin tins or ramekins. Bake at 375°F for 20–25 mins.
Allergy Information
Contains: dairy (butter), wheat (flour, crust).
Gluten-free option: Use certified GF flour and crust.
Nut-free: This recipe is naturally nut-free.
Always check labels—especially on pre-made crusts and extracts.
Nutrition Facts (Per Slice – Approximate)
Based on 8 servings
Calories: 280
Fat: 12g
Saturated Fat: 7g
Carbohydrates: 40g
Fiber: 1g
Sugar: 20g
Protein: 3g
Sodium: 220mg
Note: Nutrition values are estimates and may vary based on brands and substitutions. Not intended as medical advice.